How to Receive a Shipment
Receiving is one of the most important daily tasks in a parts department. Every part that comes through the door needs to be scanned so your DMS stays accurate and customers get notified about their special orders. ScanIt Parts scans all barcode types — 1D, 2D, and QR codes from every OEM — automotive, powersports, and heavy duty. If a part has no barcode, type the part number and the 6059+ prints an adhesive barcode label to attach to the box.
Receiving needs today's open orders to already be pulled from your DMS. ScanIt Parts pulls orders once each night on the schedule IPS configured for your dealership. If a shipment arrives before that nightly pull has run today, click the Pull Orders button at the top of the dashboard — it pulls fresh orders on demand. The dashboard Settings page accepts only one time per pull type; need a second daily pull added? Call 810-695-9332 or email support@ipsdev.com.
Step 1: Select Receive on the Scanner
From the main menu, tap Receive to enter receiving mode. This opens the receiving screen where you will configure your settings before scanning parts.
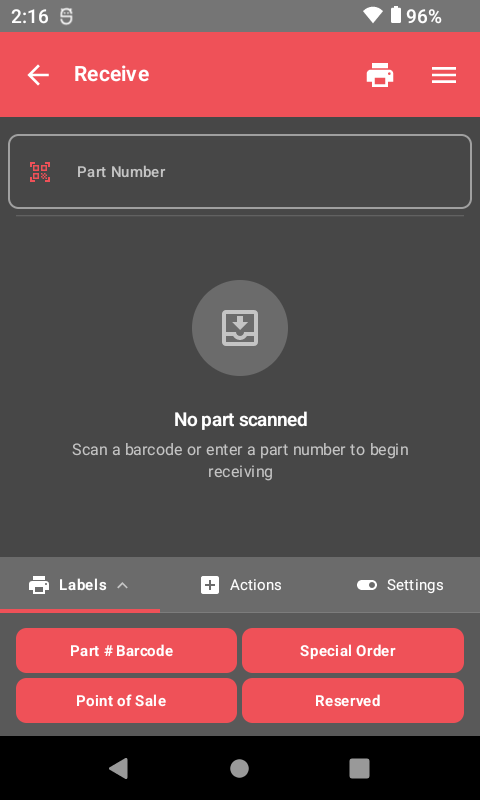
Step 2: Configure Your Scanning and Printing Settings
Before you start scanning, you need to set two important options:
Single Mode
- Toggle left (off): The scanner will prompt you to enter a quantity if more than one of the same part is on order. This is faster when receiving multiple units of the same part.
- Toggle right (on): You will need to scan every single part individually — no quantity prompt. Use this when you want to verify each physical unit.
Print Mode
- Toggle left (off): Labels will only print for special orders. Stock parts will not generate a label automatically.
- Toggle right (on): Labels will print for everything you scan — both stock and special orders.
Recommended for daily receiving: Most parts departments keep Single Mode off (so they can enter quantities) and Print Mode off (so labels only print for special orders). This keeps the process fast while still tagging customer orders.
Step 3: Scan Parts to Receive
Now start scanning. Point the scanner at the barcode on each part and pull the trigger. For each scan, ScanIt Parts will:
- Look up the part in your DMS.
- Check if it is a stock order or a special order.
- Update the DMS with the received quantity.
- Print a label if your Print Mode settings require it.
Special orders are flagged automatically. When you scan a part that is on a special order, the scanner will display the customer name and order information. A special order label is printed with the customer's name so you can set it aside for them.
New Feature -- Print History: Tap the clock icon in the top bar to see your recent print jobs, including part number, label type, time, and quantity. The scanner also plays an attention tone when order or shipment selection modals appear, so you never miss a prompt. When printing more than one label, a confirmation dialog asks "Print X labels?" to prevent accidental bulk prints.
Step 4: Print Additional Labels
After scanning a part, you can manually print additional labels if needed. The receiving screen provides several label types:
- Part # Barcode — Standard label with part number barcode, bin location, PNC, group, and description. Use this for shelf labels.
- Special Order — Label showing customer name and order details. Attach to the part so anyone can see who it belongs to.
- POS (Point of Sale) — Label with a large price display for counter sales.
- Reserved — Label indicating the part is reserved for a specific customer or job.
Handling Common Situations
Part Not Found
If you scan a barcode and the system says the part is not found, it means the barcode does not match anything in your DMS. This can happen with manufacturer UPCs, aftermarket packaging, or bulk case barcodes. You have two options:
- Type the part number manually using the on-screen keyboard.
- Use Add to Lookup to create a permanent cross-reference between the scanned barcode and the correct DMS part number. After that, the barcode will work everywhere in ScanIt Parts.
Quantity Mismatch
If the quantity you receive does not match what was on order, scan what you physically have. The system will record the actual received quantity, and any discrepancy will be visible in the receiving report for your manager to review.
Always scan what you physically have. Never adjust quantities to match the packing slip without verifying the actual parts are in the box. Accurate receiving prevents downstream inventory problems.
Related Resources
Ready to See ScanIt Parts in Action?
Schedule a personalized demo and see how ScanIt Parts can transform your parts department.
Request a Demo